Let's do it together!
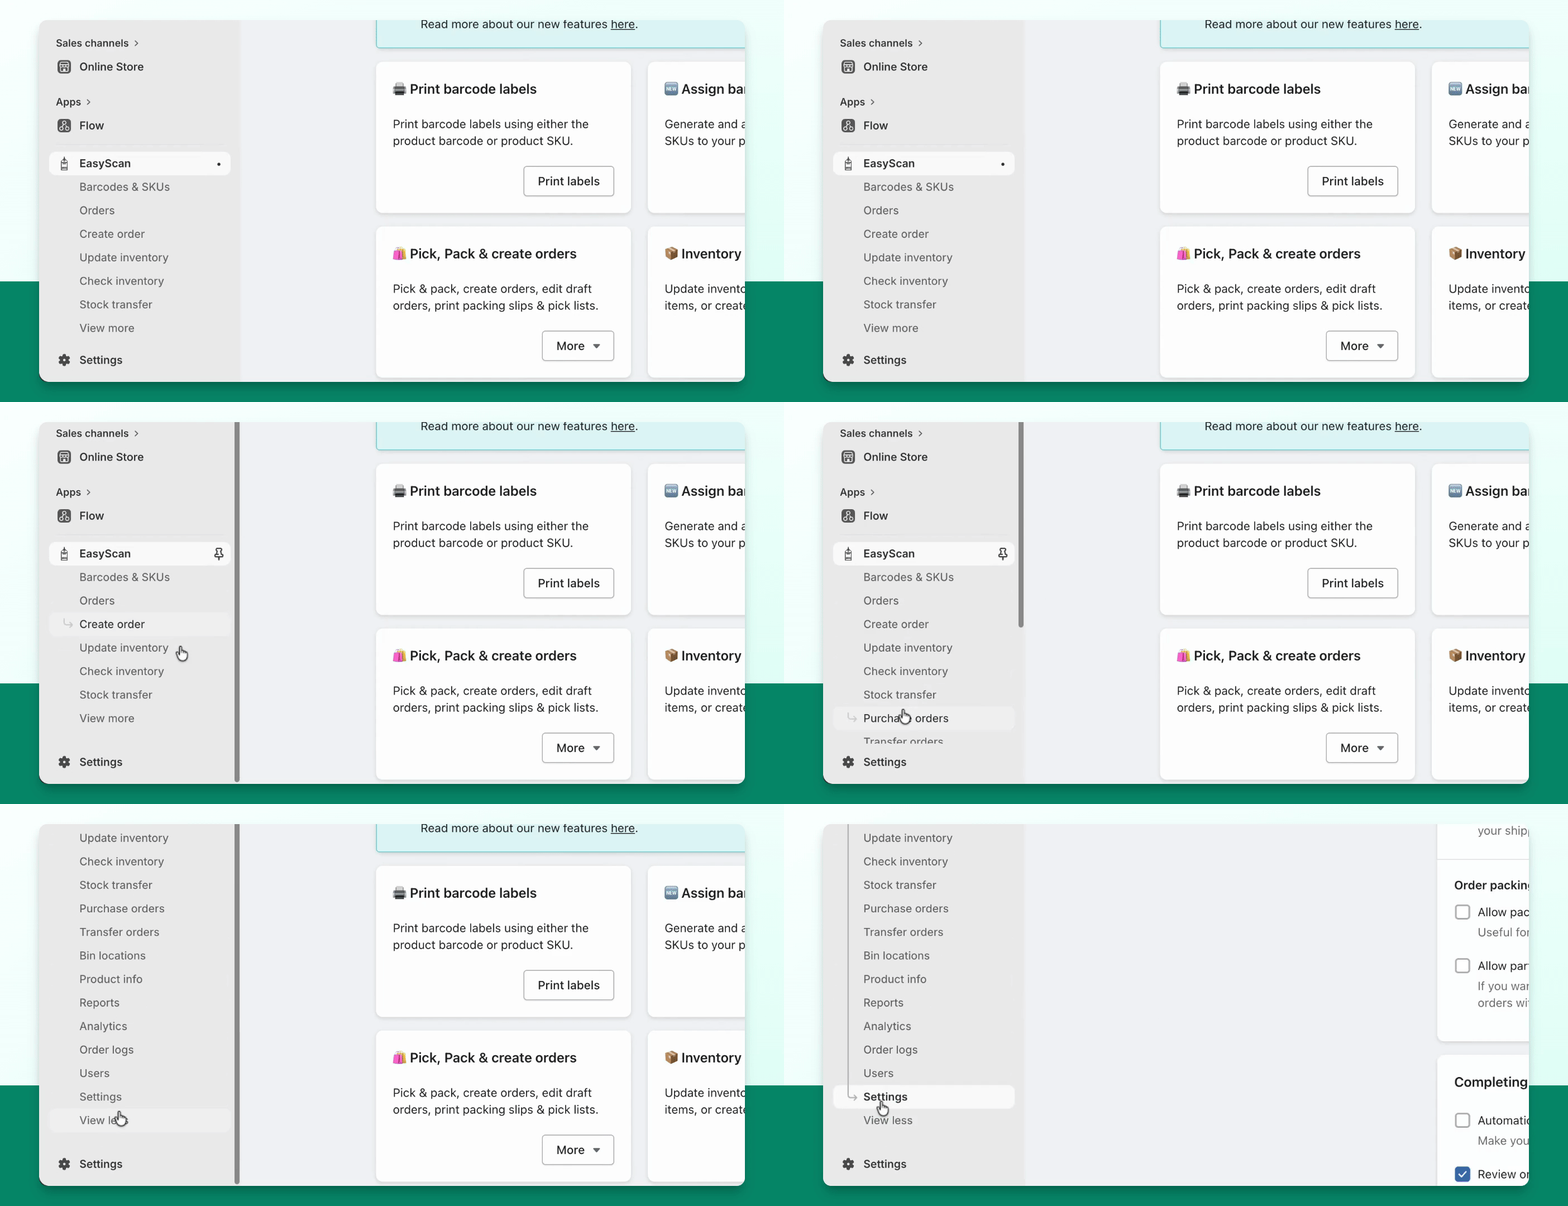
Step 1: Open Settings
Navigate to the EasyScan settings page to adjust your order search options.
Step 2: Access Order Index
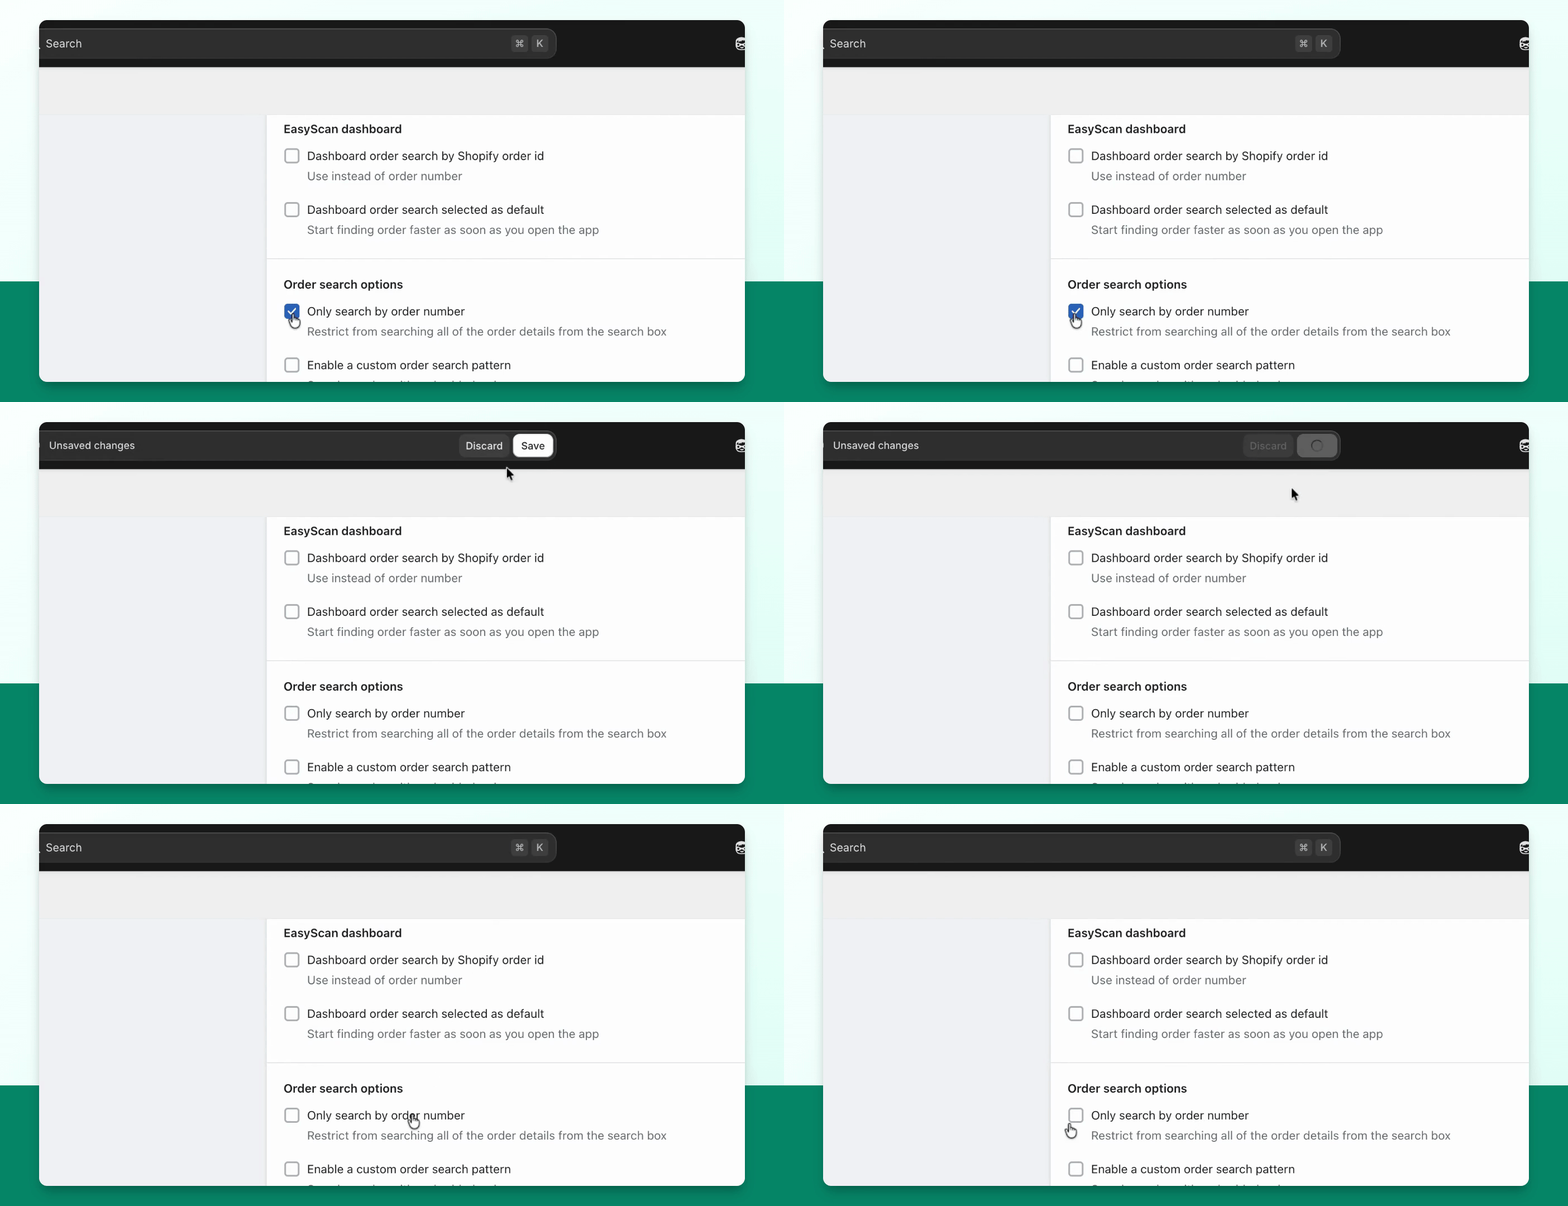
Within the settings, go to the orders section and scroll down to Order Index.
Step 3: Modify Search Settings
Disable the option for Only Search by Order Number to enable tracking number searches.
Match tracking numbers and custom formats
Once tracking-number search is enabled, the same "Order search options" section in Settings → Orders → Order Index lets you go further.
Courier presets — add a built-in preset for USPS, DHL eCommerce, FedEx, or DHL Express and EasyScan automatically strips the courier's routing prefix from a scanned label so the real tracking number is used for the search:
USPS — removes the 420 + ZIP routing prefix from IMpb barcodes
DHL eCommerce — removes the same USPS-style routing prefix from DHL eCommerce labels
FedEx — extracts the 12-digit tracking number from a 34-digit FedEx barcode
DHL Express — extracts the 10-digit waybill number from a JJD license-plate barcode
Custom search patterns — if a courier isn't in the preset list, or your labels embed the order name in a non-standard format, add up to 3 custom patterns using the order number as a placeholder, e.g. "ABC {order_number} 987". Use {order_number:3} or {order_number:-3} to trim characters from the start or end of the extracted number. The "Try a scan" preview in Settings shows exactly which characters get stripped and which are kept before you save.
If a scanned code doesn't return a result as a plain order number, EasyScan automatically retries the search using the courier presets and custom patterns you've configured — you don't need to select which one applies at scan time.