TL;DR
Let's Do It Together!
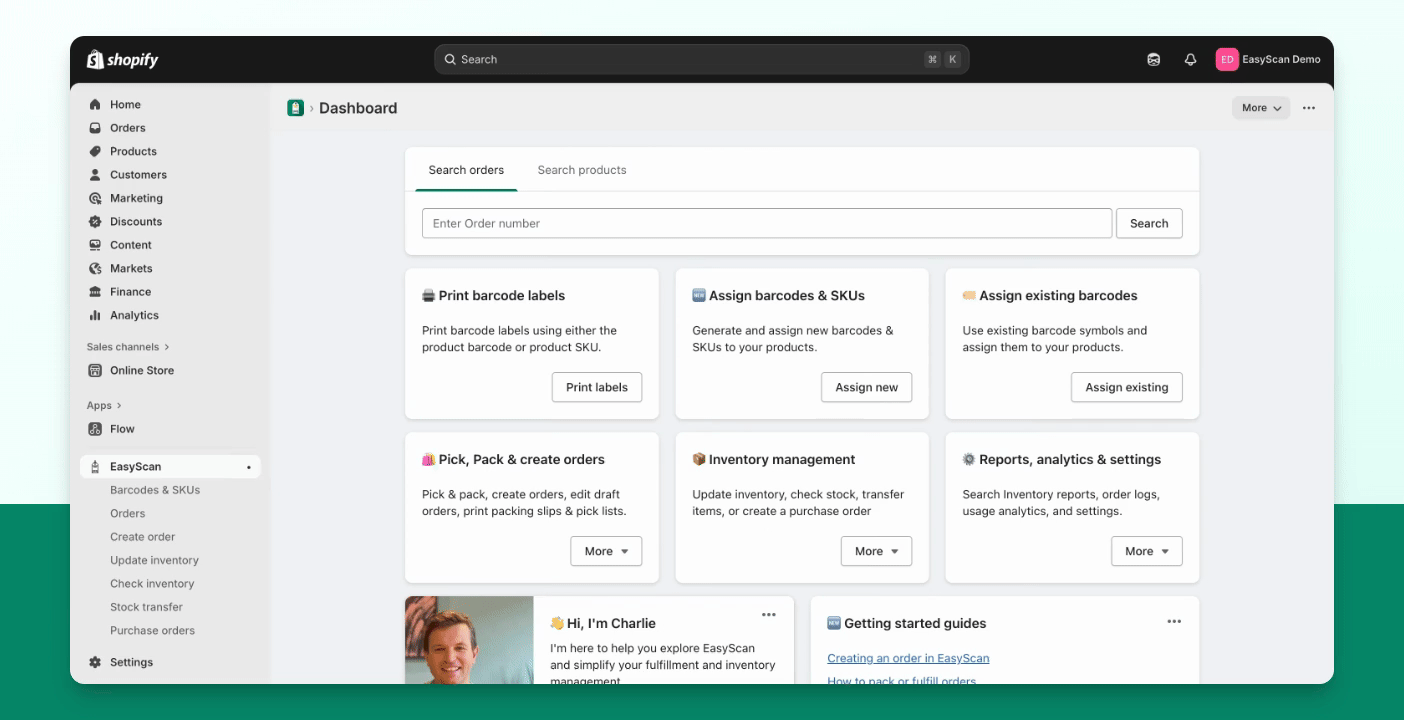
Step 1: Access the Purchase Order
Go to the Purchase Order page.
Select the purchase order you wish to receive.
Click on Receive Inventory.
Step 2: Scan or Select Items
Scan the items you wish to receive.
Alternatively, use the Quantity Selectors to enter quantities.
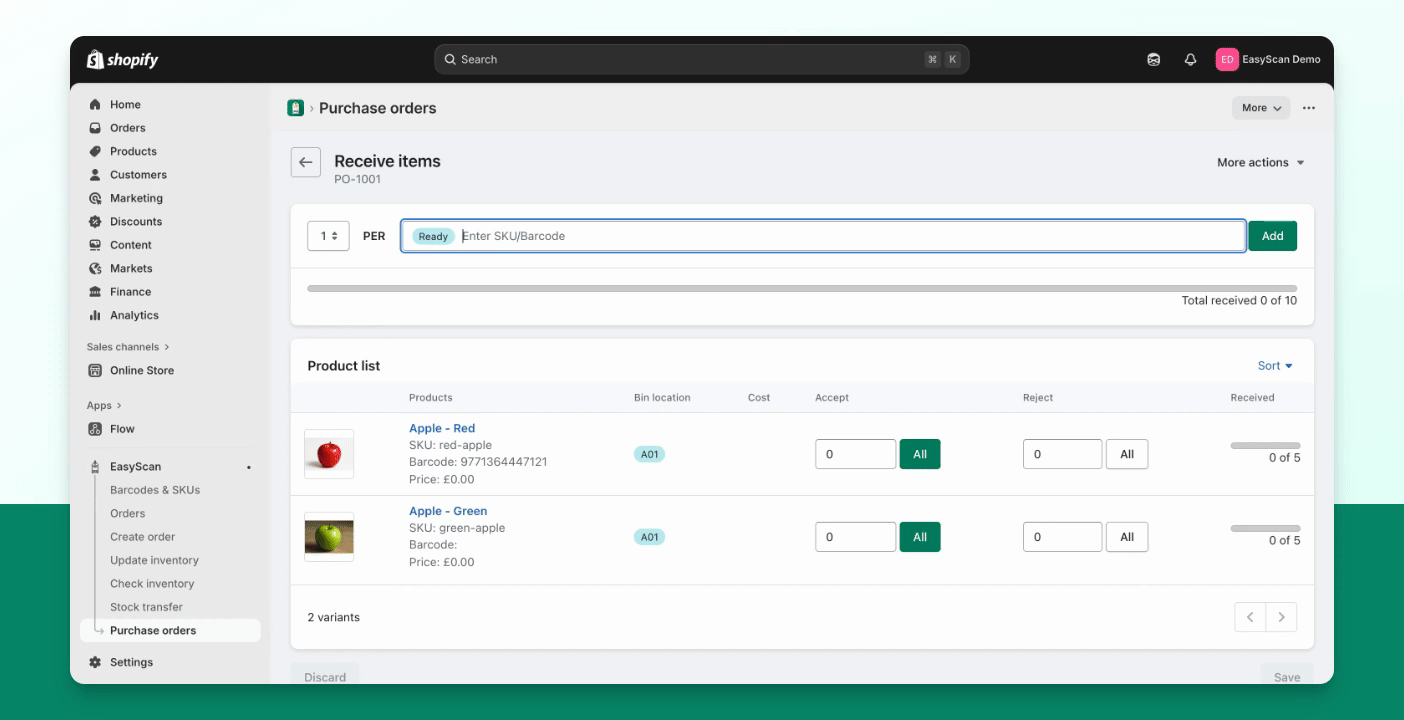
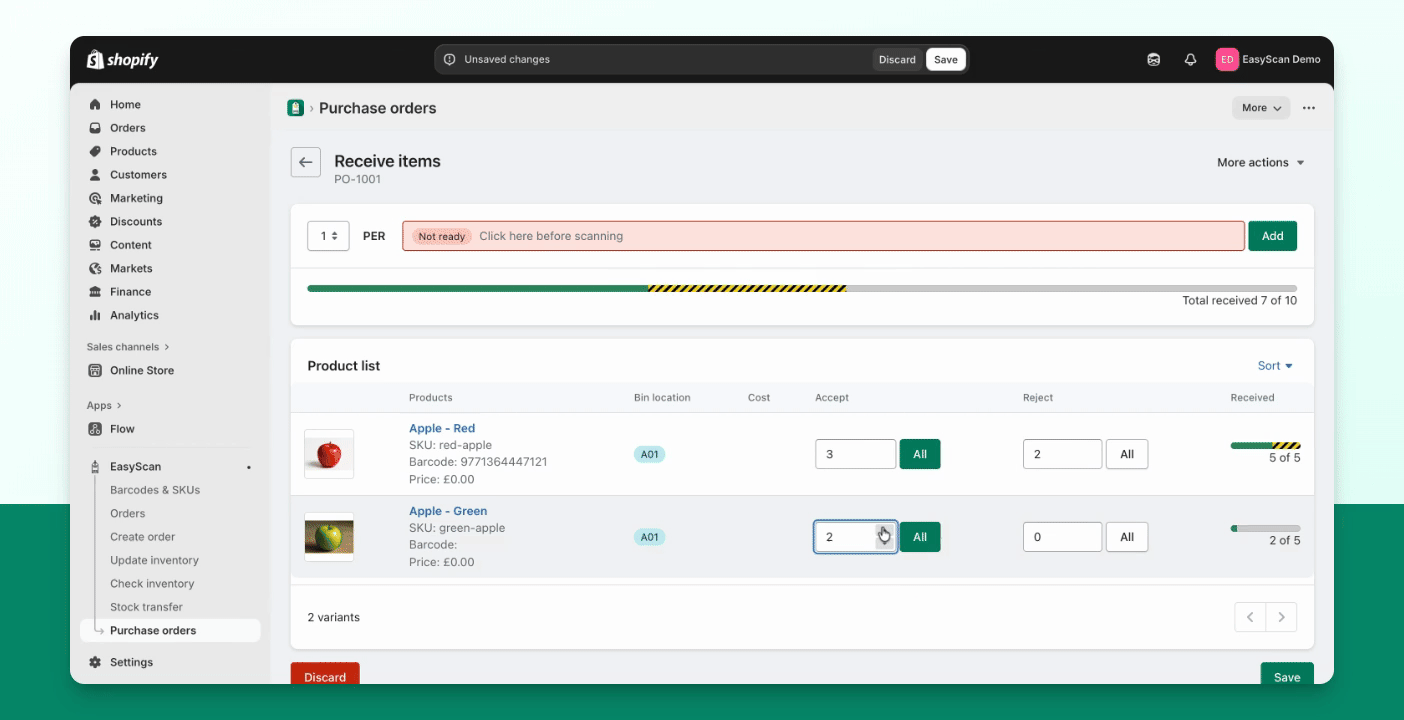
Step 3: Accept or Reject Items
Accept or reject items individually.
Use the Accept All or Reject All buttons for efficiency.
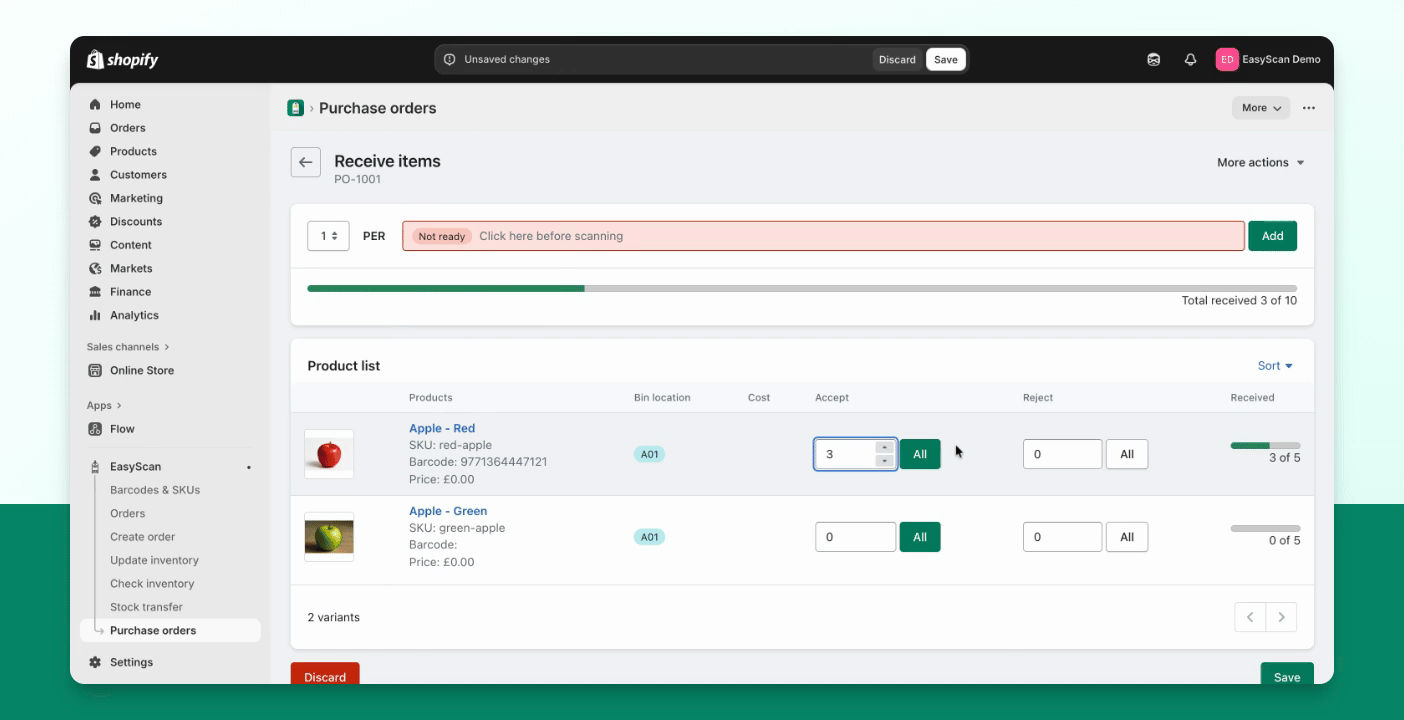
Step 4: Save Partial Receipts
If necessary, click Save to mark the order as Partially Received.
This is useful for receiving in multiple dispatchments.
The purchase order is now marked as Partially Received.
Step 5: Finalize the Receipt
Once you receive the remaining items, click on Receive Inventory again.
The previously partially received items will be displayed.
To see the full order, press Edit and mark the rest as received.
Finally, click Save.
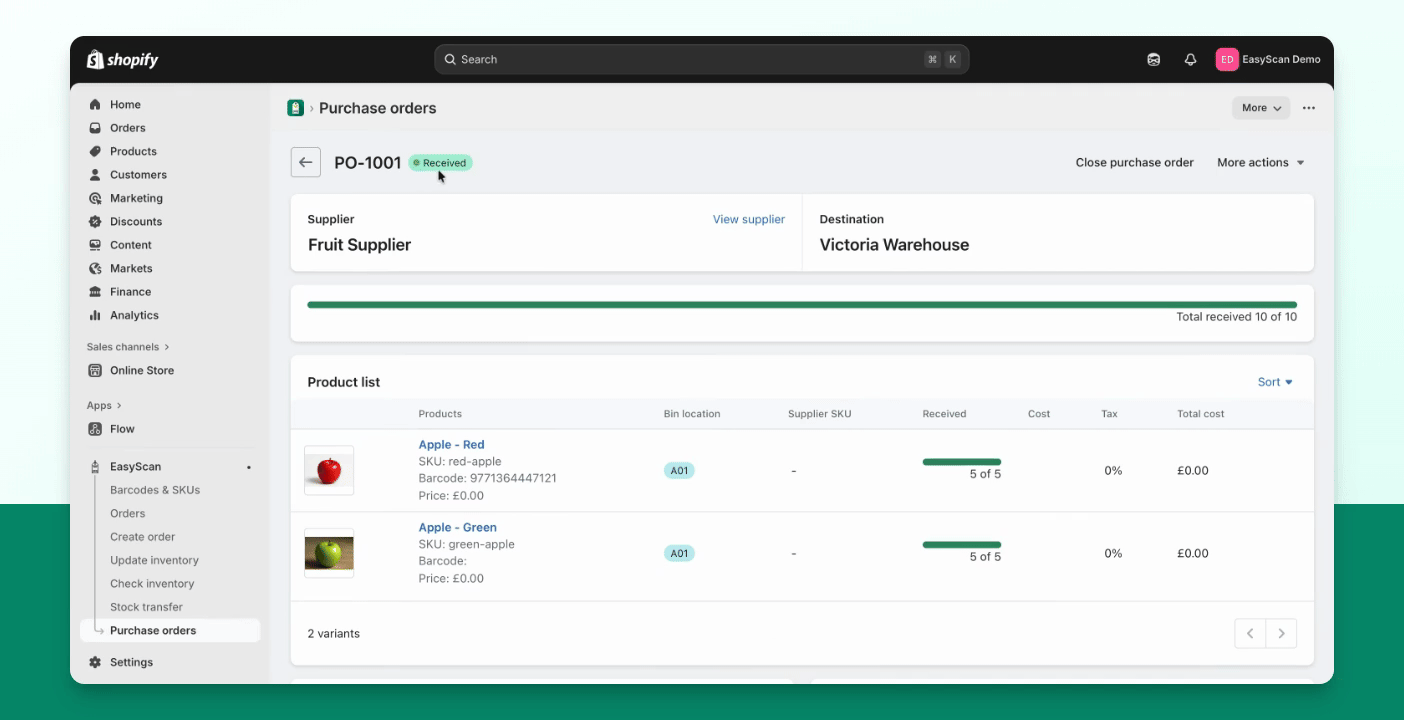
The purchase order is now fully marked as Received.
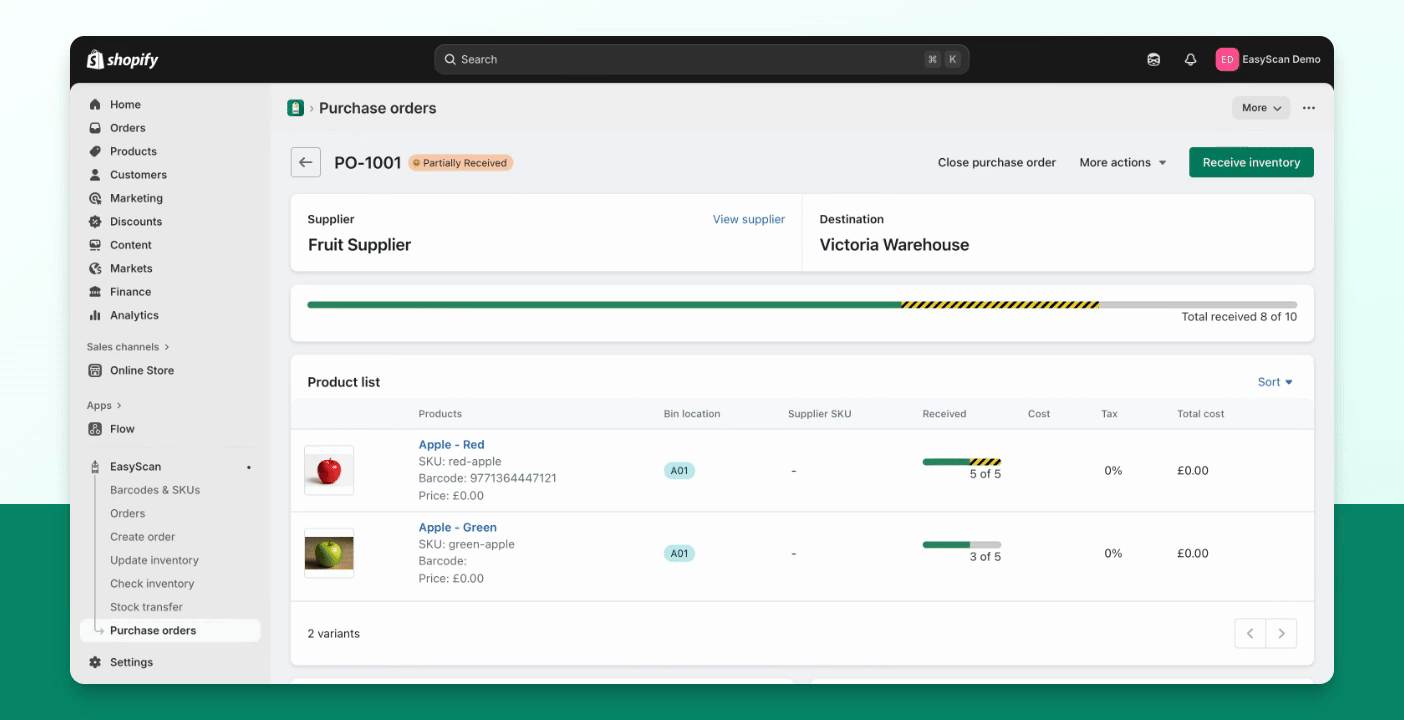
Step 6: Adjustments After Receiving
After marking as received, you can edit the order for adjustments.
This includes rejecting items if necessary.