
TL;DR
Let's Do It Together!
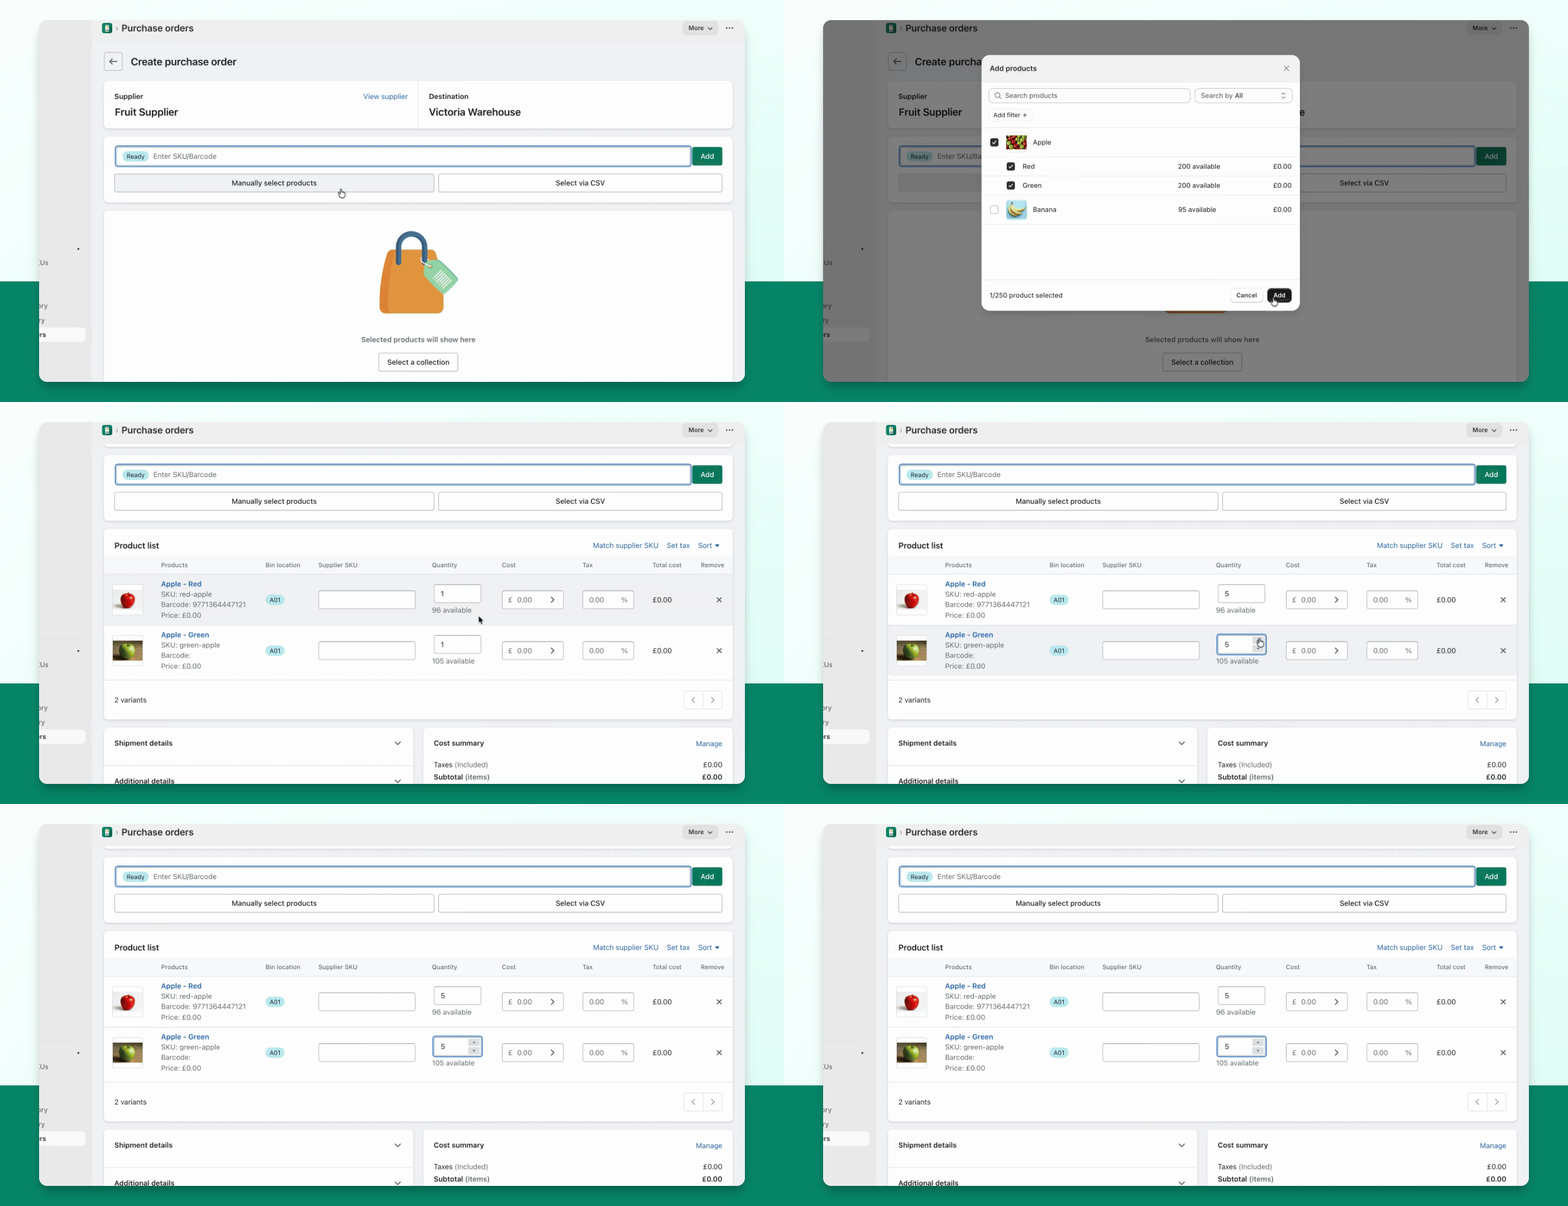
Step 1: Access Purchase Order Page
Navigate to the Purchase order page.
Click on Create Purchase Order.
Step 2: Select Supplier and Destination
Select a supplier and enter the destination.
Step 3: Enter Product Details
Enter the product and quantity.
Add the supplier, SKU, cost, and any tax.
Smart generate builds suggested lines for the selected supplier and destination. Use the supplier catalog or a specific collection, and choose Demand forecast, Smart restock, Fill to maximum, or Fixed amount. Supplier product assignments are respected; the catalog is not limited to vendor-name matching.
Review the settings required by your chosen strategy. The treatment of missing Min, Max or sales data varies by strategy; products are not universally skipped merely because all three inventory-requirement fields are not set. Smart restock can also identify oversold stock that has not yet had requirements configured. Review the generated quantities and any explanation when no order is recommended.
Each purchase order is limited to 500 product-variant lines on both Advanced and Pro. From the PO index, a larger Smart generate result can be split into up to 5 drafts of 500 lines (2,500 total) after confirmation. In an existing draft, the action can fill the remaining space up to 500; review the number of items omitted.
R
Step 4: Additional Information
Add shipment details, additional details, and payment details.
Step 5: Save the Purchase Order
Press Save to create a draft purchase order.
You have now created a draft purchase order.
Notes and supporting documents: add line-item notes for receiving instructions and use Attachments for supplier confirmations or invoices. Attachments are stored in Shopify Files. The Timeline records changes. PDF and CSV exports have optional fields and scopes, including outstanding items; review Settings → Inventory → Purchase orders for the output you need.
Step 6: Manage Your Purchase Order
From the draft, you can delete, duplicate, export as CSV, or print as PDF.
For CSV mapping, export options and attachments, see Import, export and share purchase orders.
Step 7: Mark as Ordered
Once satisfied, click Mark as Ordered.
Note: After marking as ordered, you cannot revert to draft.
Press Mark as ordered to confirm.
You are now able to receive incoming inventory from your supplier.