TL;DR
Let's Do It Together!
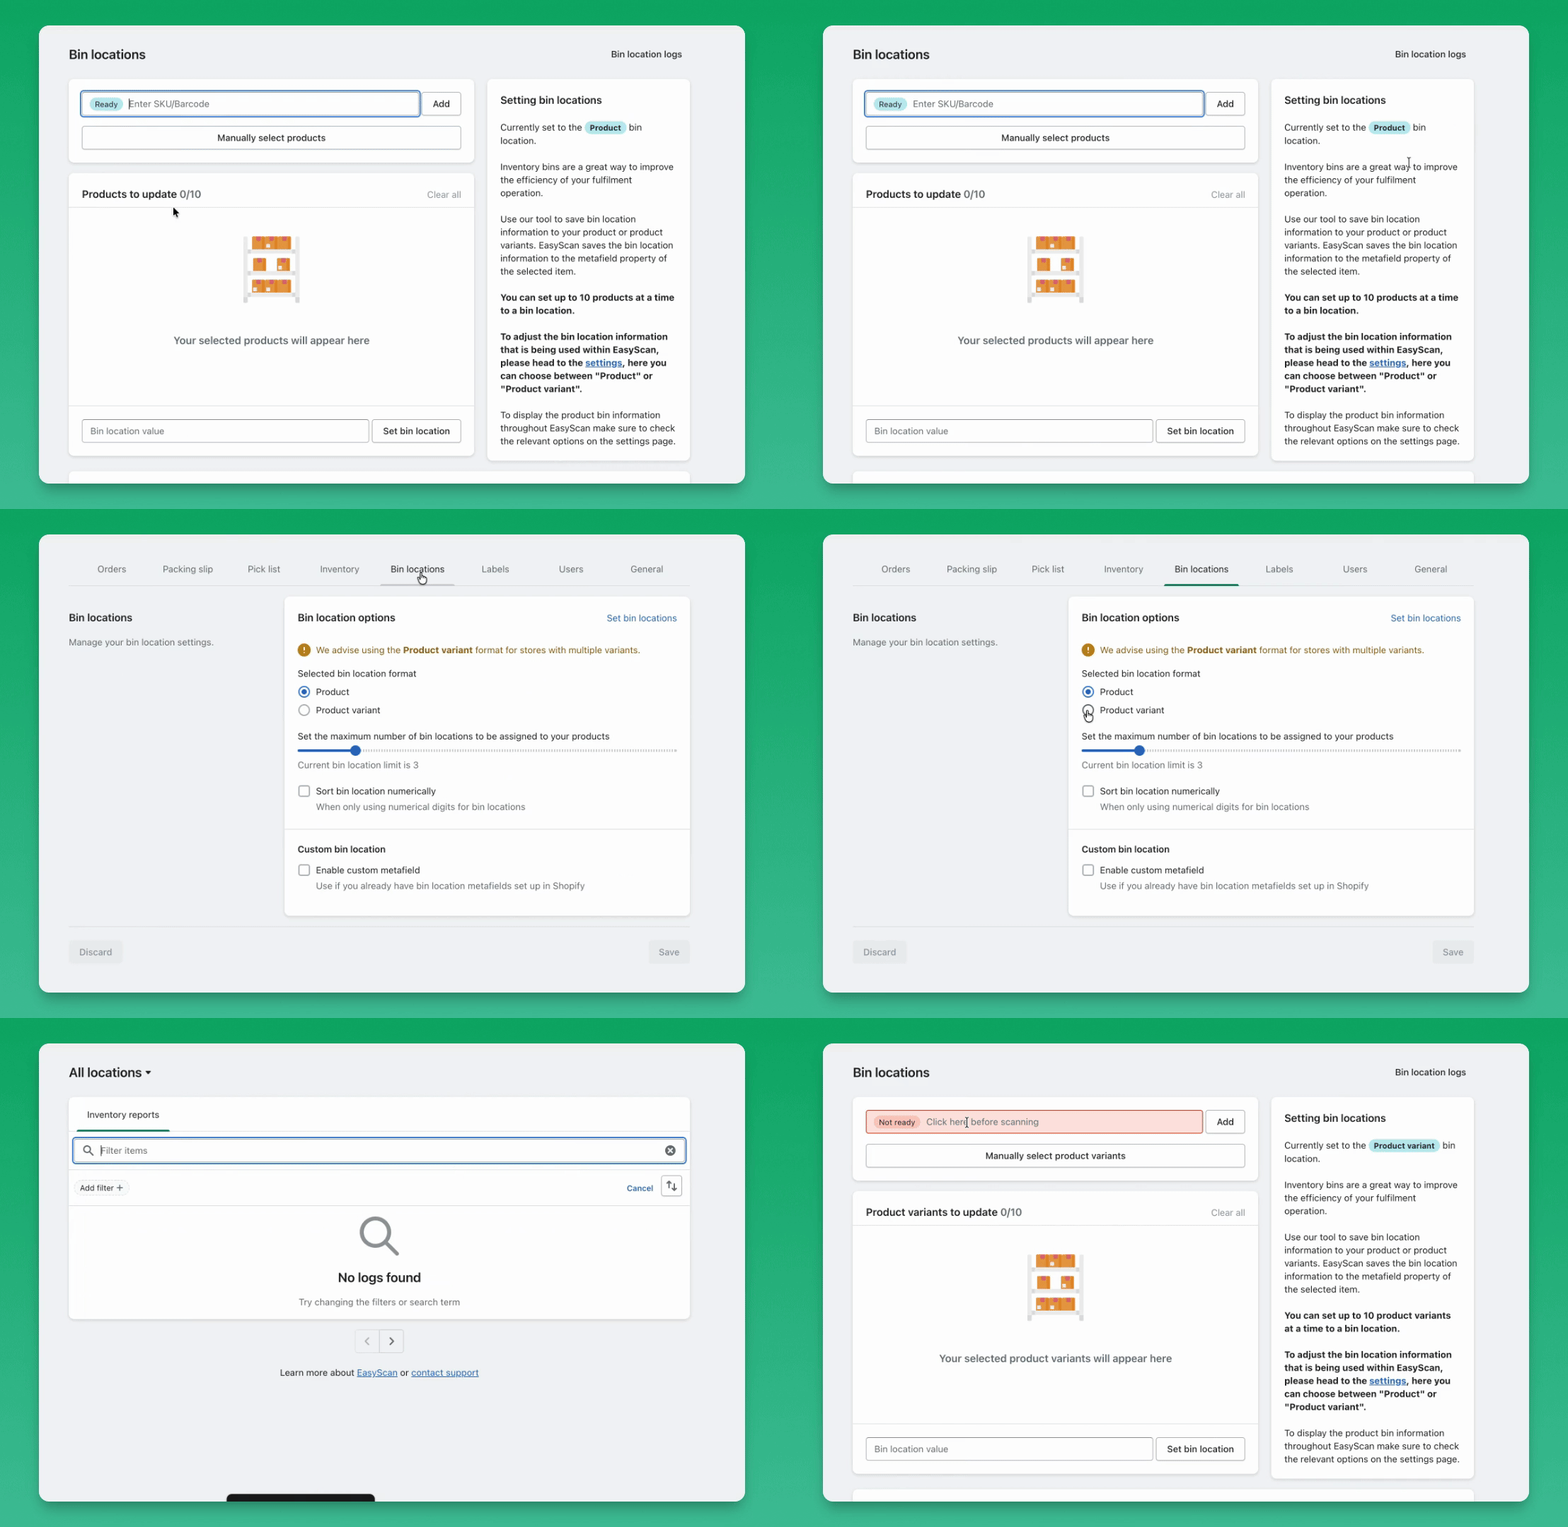
Step 1: Access Bin Locations
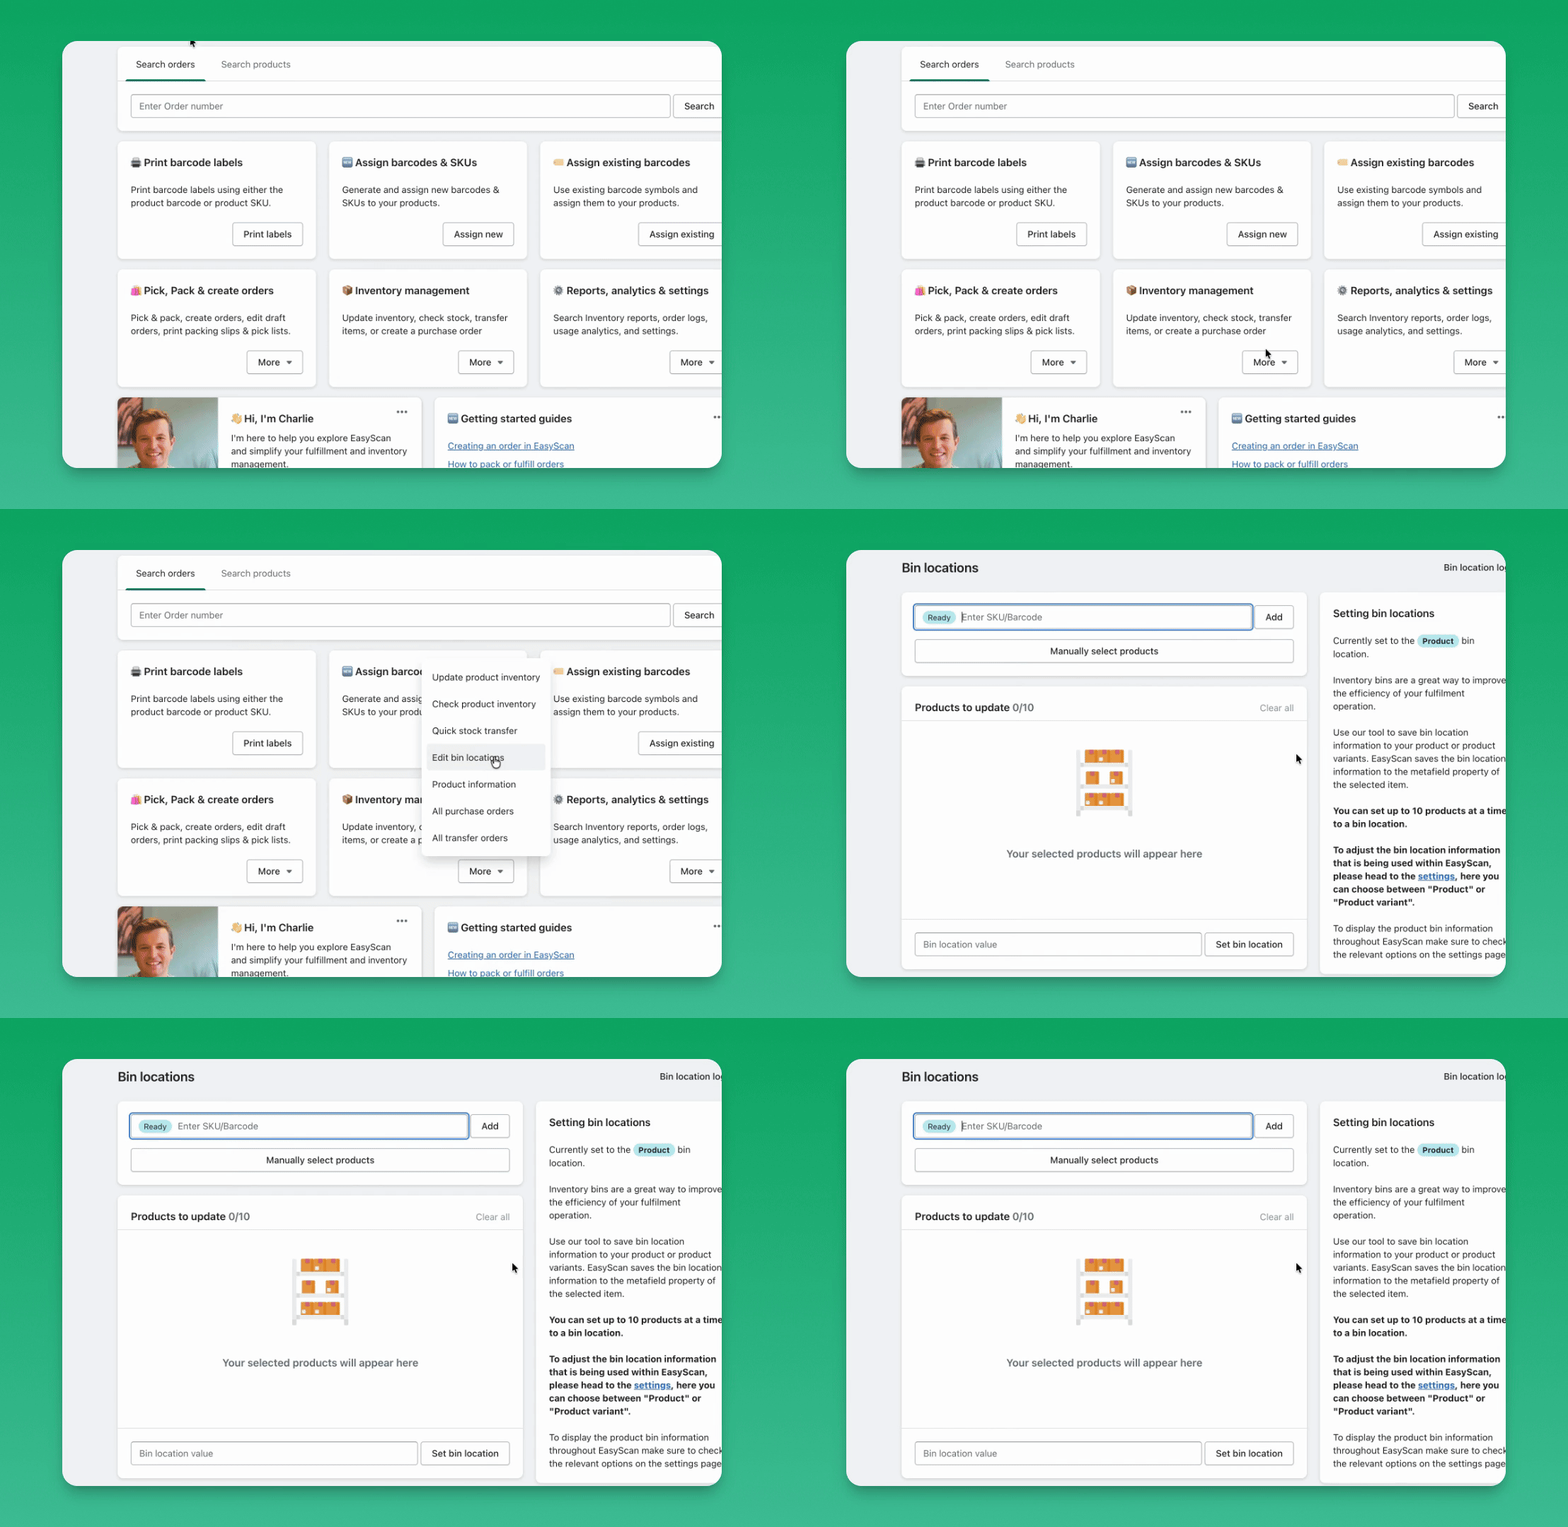
Go to the sidebar, press View More, and select Bin Locations.
Alternatively, on the main screen dashboard, navigate to Inventory Management, click More, and then edit Bin Locations.
Step 2: Choose the Storage Format Before Assigning
In Settings → Bin locations, choose Product or Product variant to match how you organise stock. Confirm the format before assigning locations. You can also configure the maximum bins per item and, if required, a custom metafield namespace and key.
The interactive assignment list accepts up to 25 items at a time. For larger changes, use Bulk import via CSV. Assigning bin labels does not adjust inventory quantities.
Bin assignment is available on Standard and above. The detailed bin-change logs and the report’s Last updated information require Pro. For several bins on one item, the configured maximum applies; bins are not separate Shopify inventory locations.
Step 3: Assign Bin Location
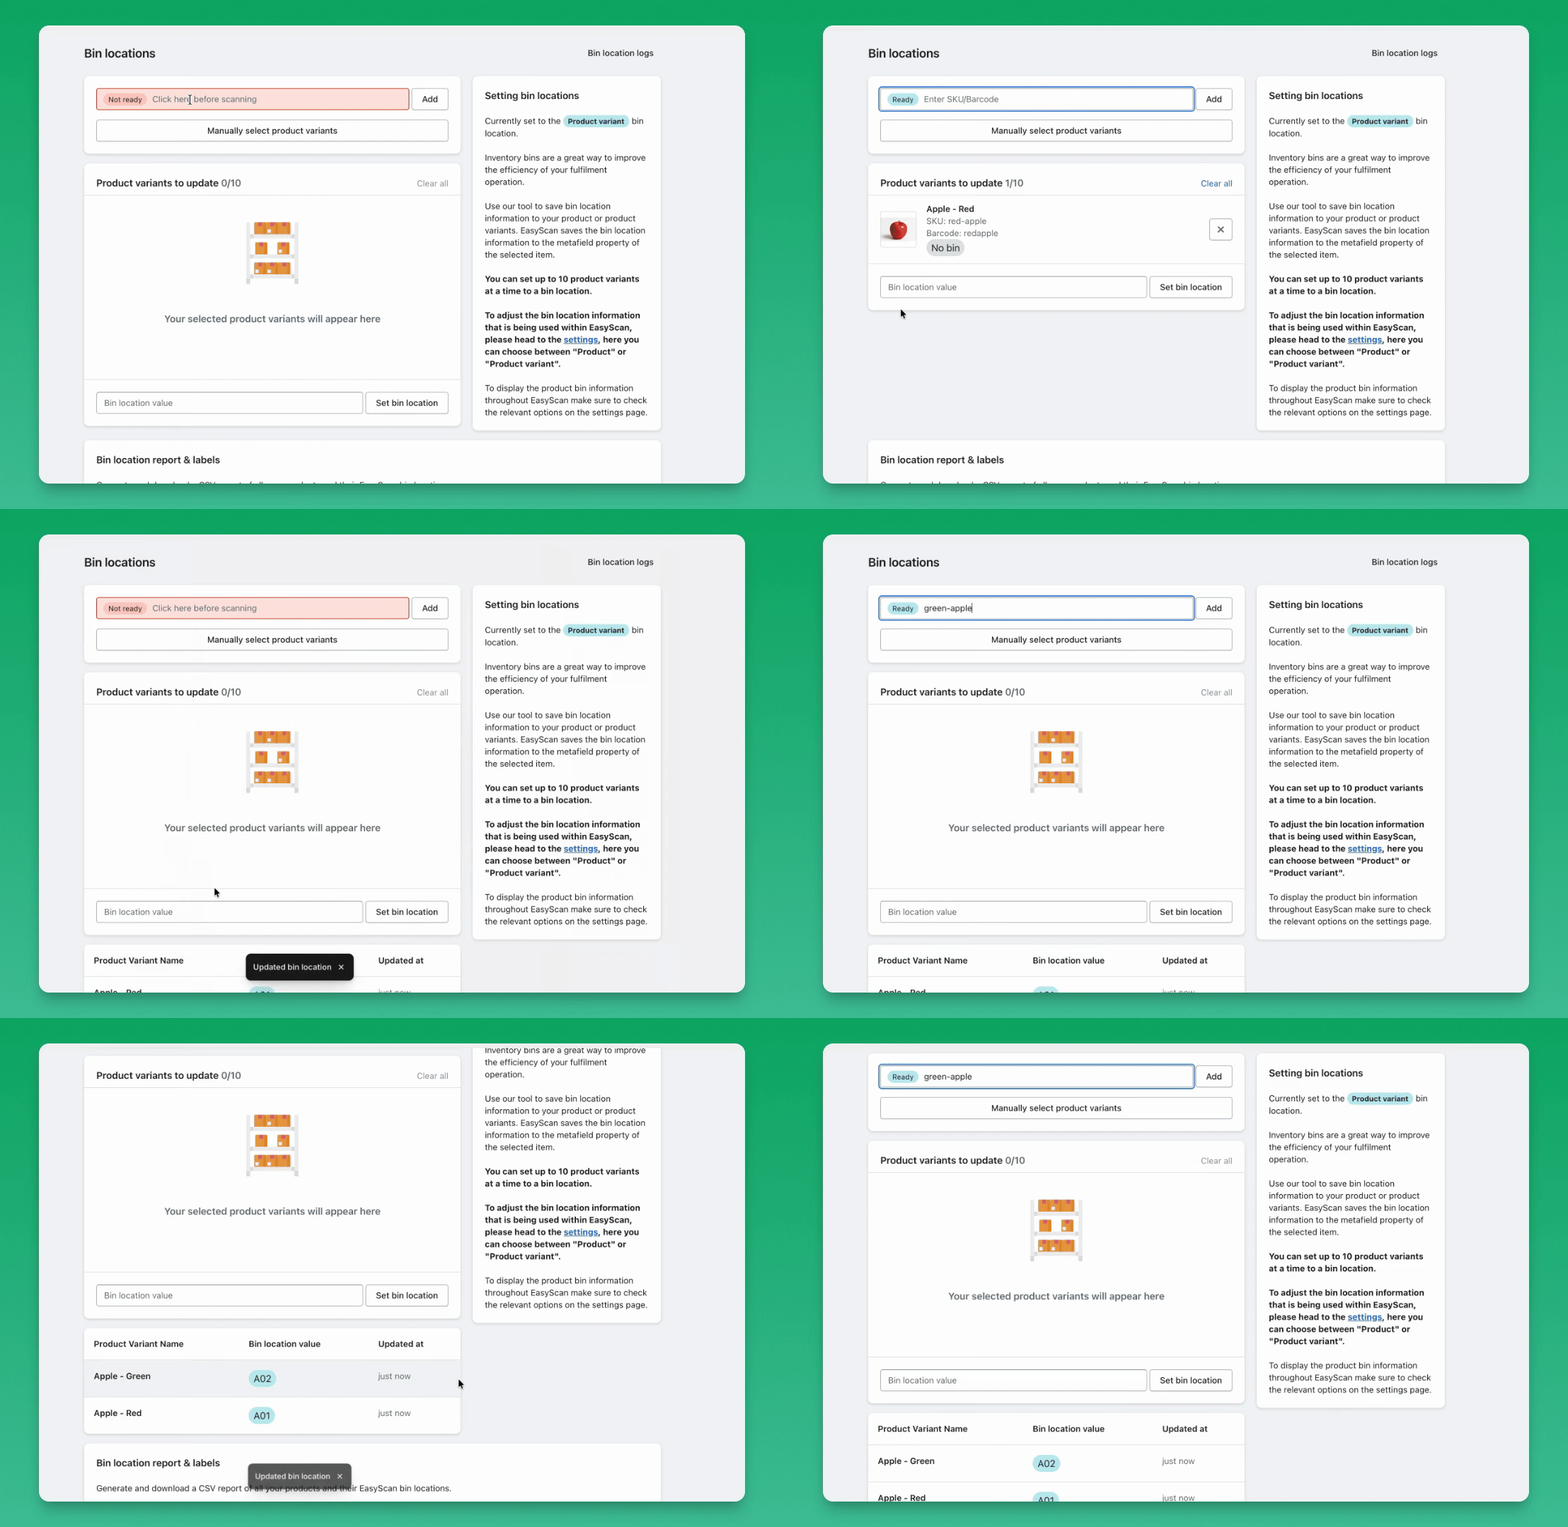
Return to the Bin Locations screen.
Enter a SKU or scan a barcode for the product.
In the Bin location value text field, type your value (e.g., 01) and hit Set bin location.
Scroll down to confirm that the variant has been assigned the bin location value.
Step 4: Modify or Remove Bin Location
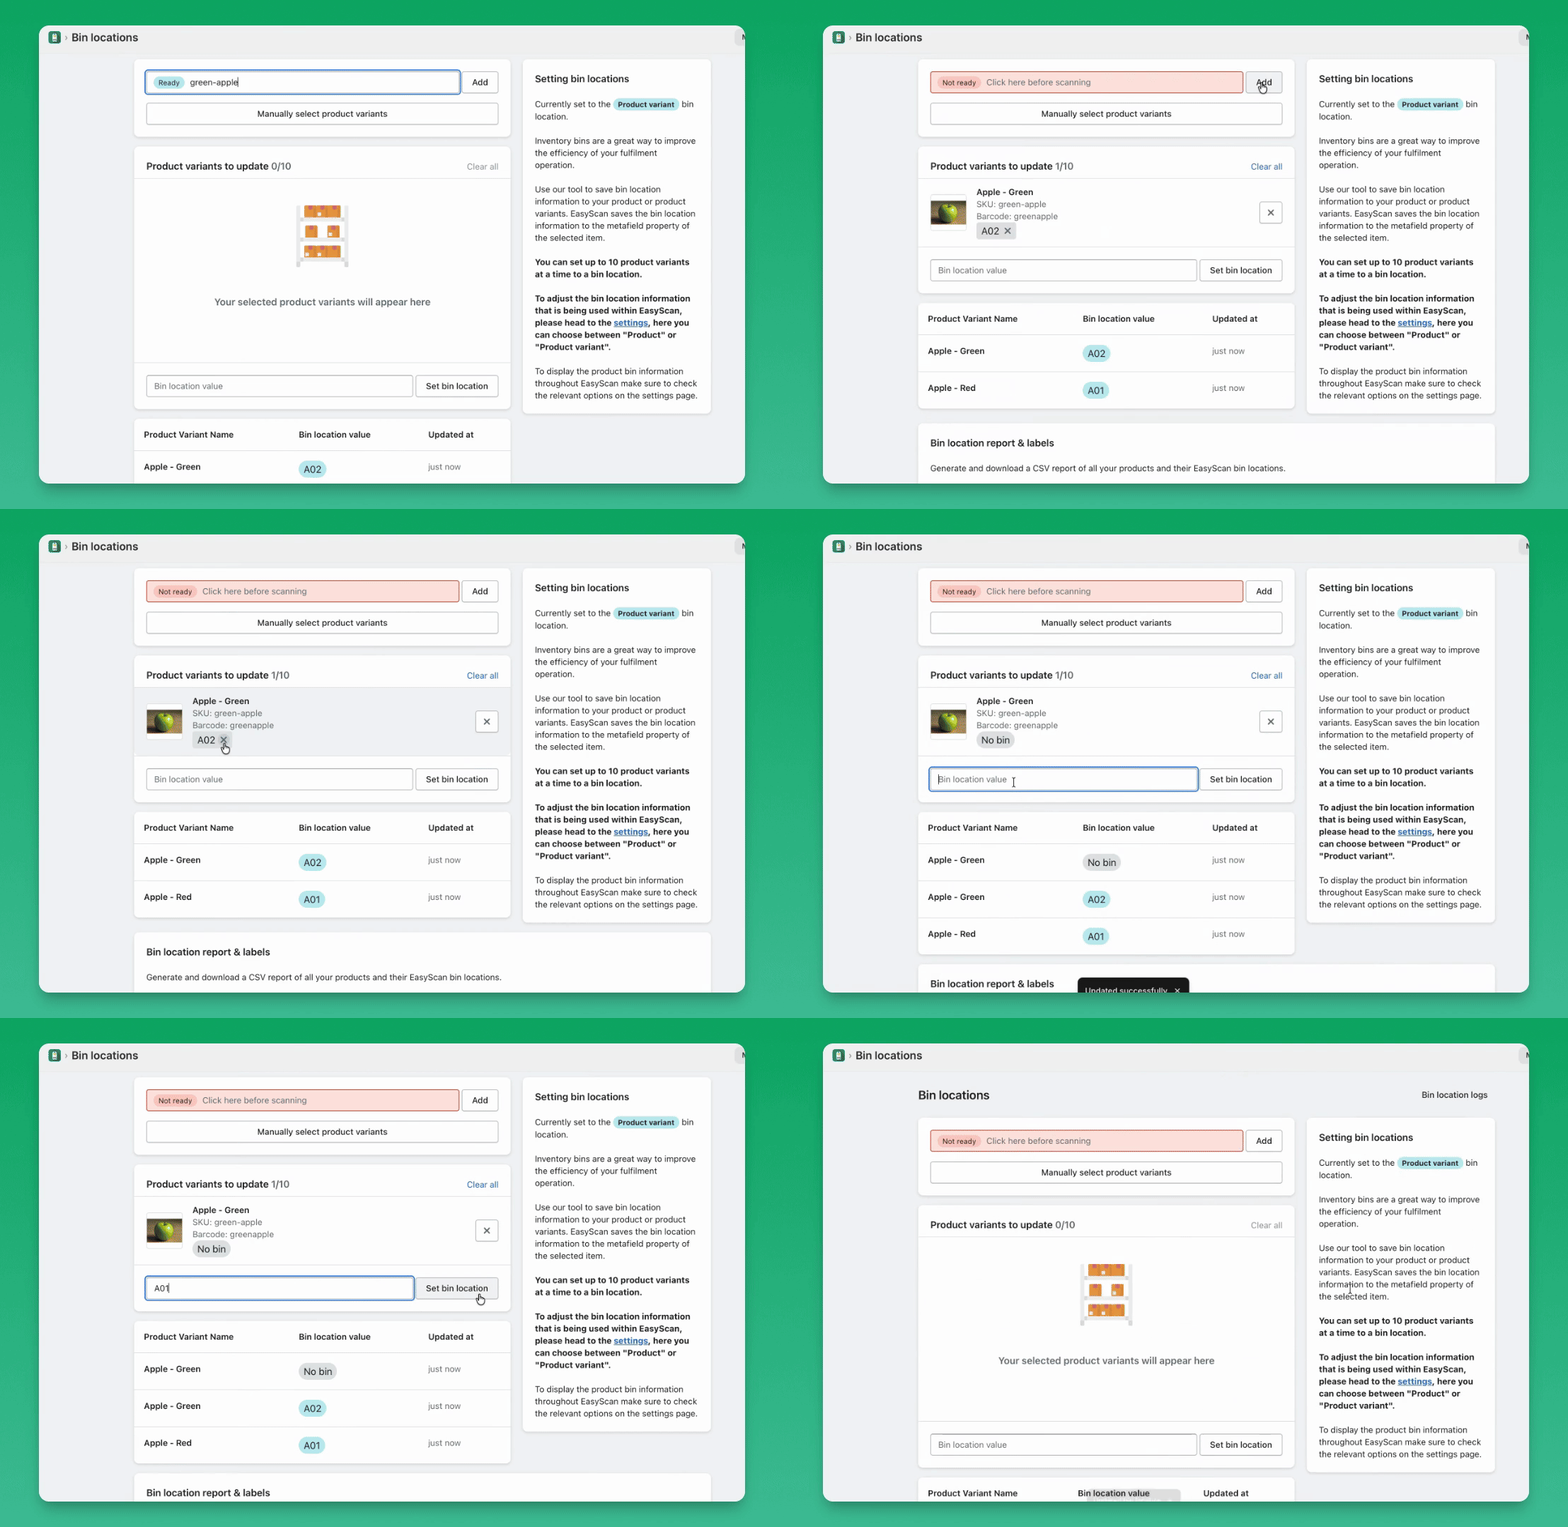
To change or remove a bin location, scan or enter the SKU of the product.
Click the gray box and hit the cross to remove it.
Modify the bin location by entering a new value and pressing Set Bin Location.
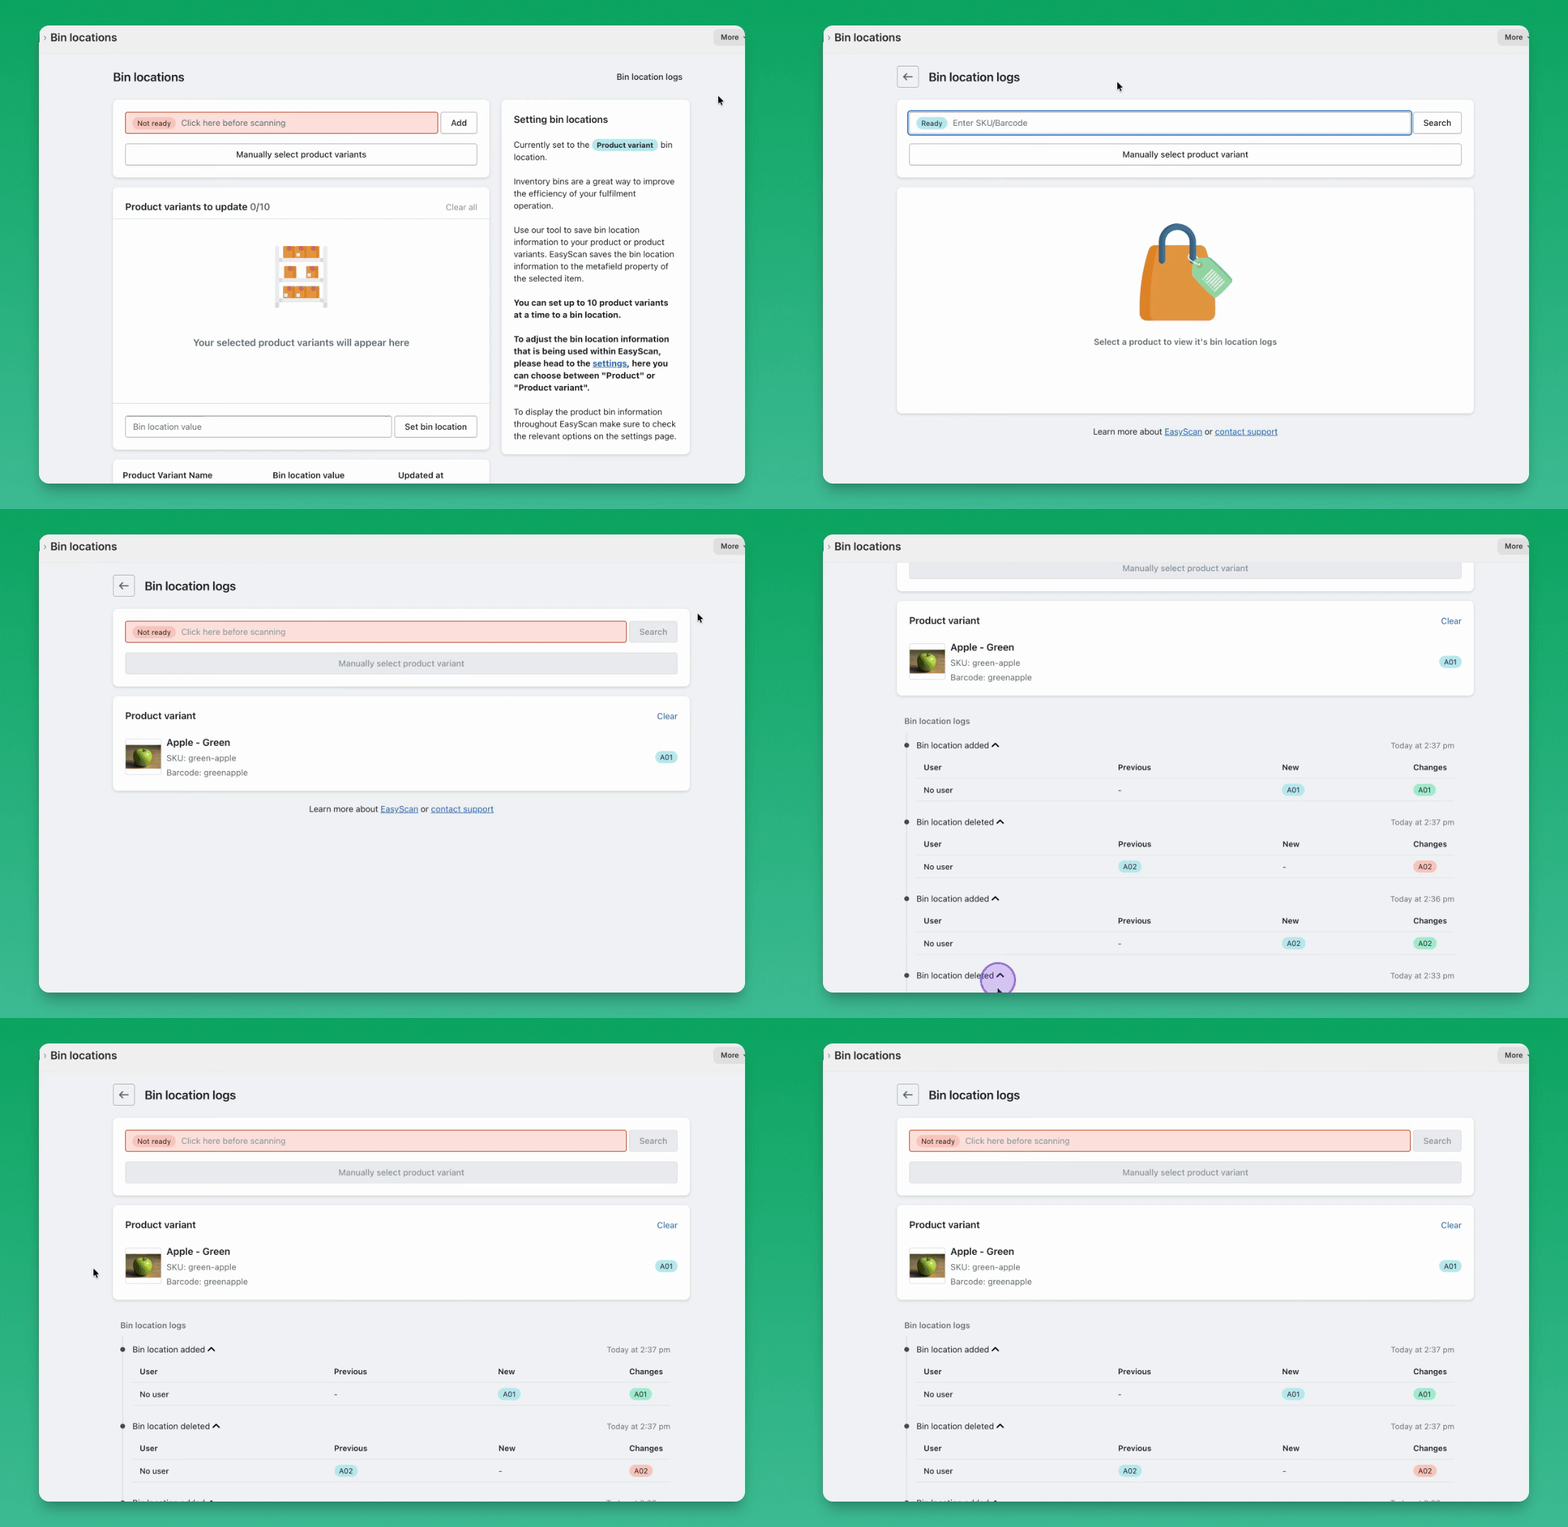
Step 5: View Bin Location Logs
At the top of the bin location screen, click the Bin Location Logs button.
Enter the SKU of the modified product and hit search to view the timeline of changes.